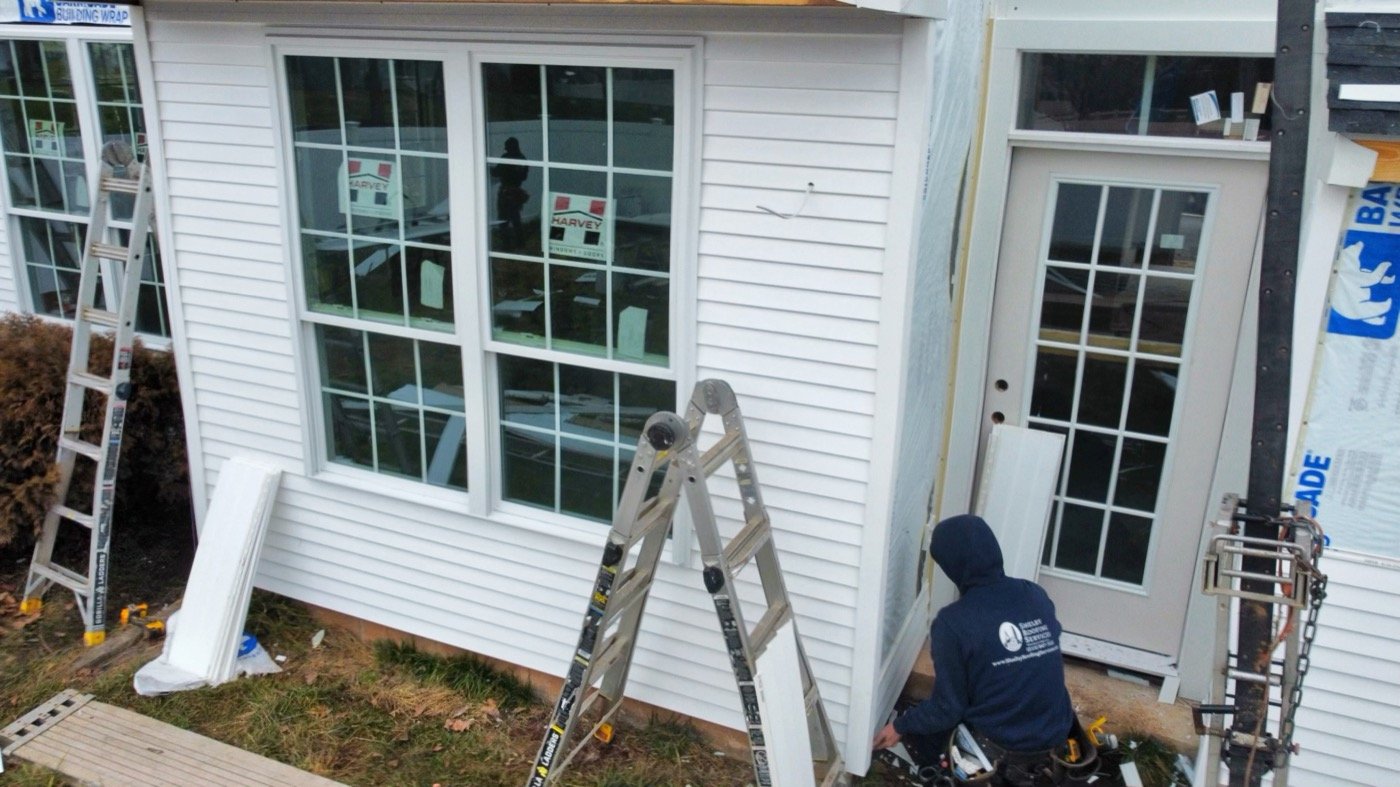
Window and siding installation — proper sequencing and building wrap integration on every project
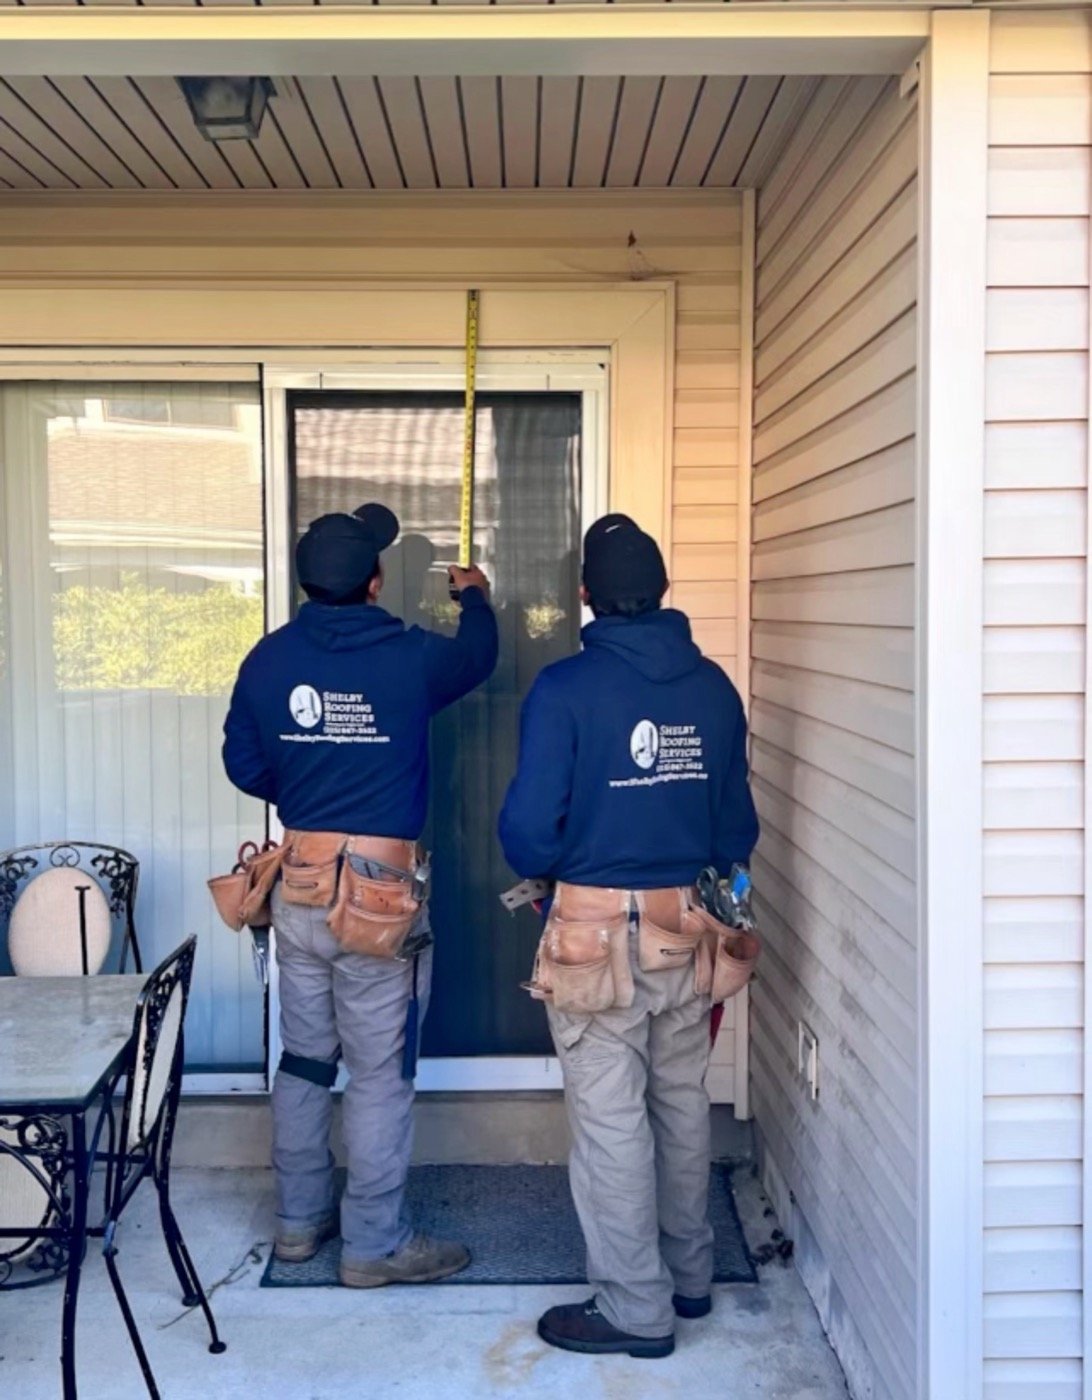
Precision measurement before every door replacement — no guesswork
Serving Blue Bell, PA and all surrounding areas across PA, NJ & Delaware — Free inspections available.
Proper Flashing Integration. Code-Compliant Installation. Long-Term Water Management.
Window and door replacement involves more than installing a new unit. It requires proper water management integration — specifically sill flashing, side flashing, head flashing, and correct housewrap sequencing — to protect the building envelope long-term. Throughout Montgomery County, Bucks County, and Philadelphia, improper flashing is one of the leading causes of long-term water damage in exterior walls.
The replacement process must address not only the window or door unit itself but the entire opening — including the surrounding framing, exterior trim, and integration with the siding system. Done correctly, the result is a watertight, energy-efficient opening that performs reliably for decades.
Best practice: Window and door replacement is ideally performed during a siding replacement project. This allows the full water management system — housewrap, flashing, and siding — to be properly integrated in the correct sequence, eliminating future leak vulnerabilities that are otherwise very difficult to address after siding is in place.
Installed at the bottom of the rough opening before the window unit is set. Directs any water that enters the opening outward and away from the framing. The first line of defense against moisture at the base of every opening. Critical to long-term performance.
Applied along both vertical sides of the window or door opening. Integrated with the housewrap and sill flashing to form a complete drainage plane around the opening. Prevents water from tracking laterally into the wall cavity.
Installed above the window or door and tucked under the housewrap above the opening. Directs water that runs down the wall away from the top of the opening. Installed last in the flashing sequence to maintain correct water-shedding order.
Housewrap acts as the water-resistive barrier between the sheathing and siding. Correct integration with window and door flashing creates a continuous drainage plane — the essential foundation of a properly protected exterior wall system.
The existing opening is inspected for framing damage, rot, moisture infiltration, and any prior installation deficiencies. Issues discovered here are addressed before the new unit is installed — carrying forward hidden damage negates the value of a new window or door.
The old unit, exterior trim, and any existing flashing are carefully removed. Removal is done in a way that preserves the surrounding framing and prepares the opening for proper installation of the new system.
Sill flashing is installed at the base of the opening before the new unit is set. This is the most critical flashing component — it must be installed correctly to establish the drainage plane that all subsequent layers depend on.
The new unit is set into the prepared opening, shimmed level and plumb, and fastened to the framing. Correct shimming and fastening ensures long-term performance of the unit — particularly for proper operation of operable windows and doors.
Side flashing is applied to both vertical jambs, integrated with the sill flashing below and overlapping the housewrap at the sides. This seals the lateral edges of the opening and prevents water from tracking into the wall cavity.
Head flashing is installed above the unit and tucked under the housewrap above the opening. This completes the flashing sequence and ensures the entire opening sheds water correctly — from the top down, overlapping each layer in the proper shingle fashion.
Exterior trim is installed and either painted or capped with aluminum coil stock. If performed as part of a siding project, siding installation proceeds over the completed flashing system. Trim integration ensures a clean finished appearance and protects the flashing edges.
Every window and door is tested for proper operation, sealing, and weathertight performance before the project is complete. The site is cleaned and any building permit inspections are coordinated.
Window capping involves covering the exterior wood trim around windows and doors with custom-formed aluminum coil stock. It protects the exposed wood from moisture and rot, provides a clean finished profile, and eliminates the need for recurring paint maintenance. Capping is a standard practice on most vinyl and fiber cement siding projects.
Exterior trim (using PVC, composite, or wood) provides a more traditional finished appearance and is commonly used on higher-end projects where the trim profile needs to match existing architectural details. Both approaches are available depending on the project scope and siding system.
Replacing windows and doors at the same time as siding is the most effective approach because it allows the water management system to be built correctly from the start — housewrap is properly lapped, flashing is fully integrated, and no cuts or compromises are made to an existing siding system.
When windows are replaced after siding is already in place, the installation requires working around the existing siding system. While this is possible and done frequently, the integration is more complex and carries a higher risk of long-term performance issues if not executed carefully.
Window and door replacement projects may require permits in many municipalities throughout Montgomery County, Bucks County, and Philadelphia. Requirements vary by scope, municipality, and whether structural changes are involved. We handle all required permits as part of every installation.
During a siding replacement project. This allows full water management integration in the correct sequence — eliminating the future leak vulnerabilities that are otherwise very difficult to address once siding is in place.
Flashing is a layered water management system installed around each opening. It includes sill, side (jamb), and head flashing that directs water away from the opening and integrates with housewrap and siding. Improper flashing is one of the leading causes of long-term water damage in exterior walls.
Capping involves covering the exterior wood trim around windows and doors with custom-formed aluminum coil stock. It protects exposed wood from moisture and rot, provides a clean finished appearance, and eliminates the need for recurring paint maintenance.
Yes, and we handle both scenarios. However, replacing windows and siding together produces the best long-term result because it allows full integration of the water management system in the correct sequence.
Housewrap is a water-resistive barrier installed over the sheathing before siding. It acts as a secondary defense against moisture infiltration and must integrate correctly with window and door flashing to form a complete, continuous drainage plane.
Yes. We handle all required permits for window and door replacement across Montgomery County, Bucks County, and Philadelphia. Requirements vary by municipality and project scope — we coordinate everything as part of the installation.
Sill, side, head flashing, and housewrap integration — every opening is fully protected in the correct sequence.
Best results when combined with siding replacement, allowing the full water management system to be built correctly from the start.
We manage all required permits for window and door replacement projects across all municipalities we serve.
Every installation is backed by our workmanship warranty and applicable manufacturer coverage.
We provide detailed assessments of existing windows, doors, flashing, and water management systems tailored to your property.